I mentioned in a recent course update that we would be starting drainage work in the very near future and indeed we have begun. I believe I mentioned also that this is a fairy normal state of affairs on a new golf course or newly renovated golf course. New golf courses, including Granite Bay in 1994, had underground drainage systems installed to accommodate surface water running off the turf and into a catch basin or drainage inlet. These original drainage inlets are normally associated with low areas or depressions that were purposeful during construction to pick up running surface water.
Drainage work that occurs after construction or renovation can be an expansion of the underground drainage system, but more often then not are what we refer to as French Drains. According to Wikipedia, these type of drains -
"may have been invented in France[2] but Henry Flagg French (1813–1885) of Concord, Massachusetts, a lawyer and Assistant U.S. Treasury Secretary described and popularized them[3] in Farm Drainage (1859)."
Drainage patterns become very evident after we start to irrigate and usually follow the flow of water and tie into the existing underground drainage.
Granite Bays french drain installation is a simple trench with 4" perforated drainpipe surrounded with 1" gravel, followed by some sand and replacement of the sod which was removed prior to trenching. The above internet image shows a fabric liner that we do not use. From our experience these geo textile fabrics slow the water infiltration and end up clogging the drain entirely. A few pictures below are worth a thousand words for those who are interested.
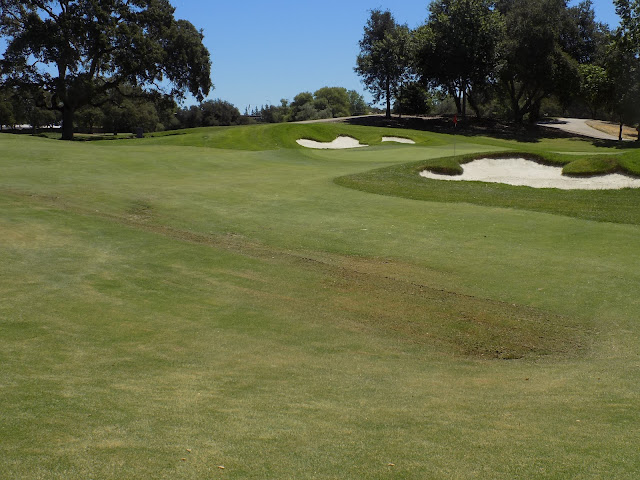 |
| First drain we did was the approach area in front of #10 green. |
 |
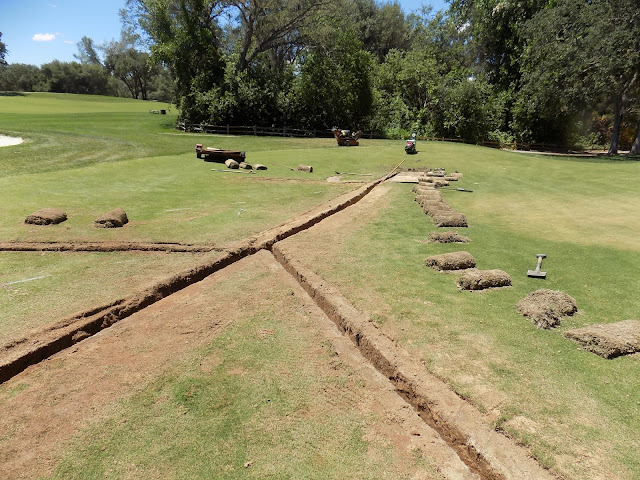
| Step 1 is removing sod where you want to trench. This area is left hand side #4 near new fairway bunker. |
 |
| Next trenching and soil removal. Soil need's to go and make room for porous drain rock and must be manually scooped up and hauled off. |
 |
| After everything is cleaned up its time for a little gravel on the bottom of the trench, then........ |
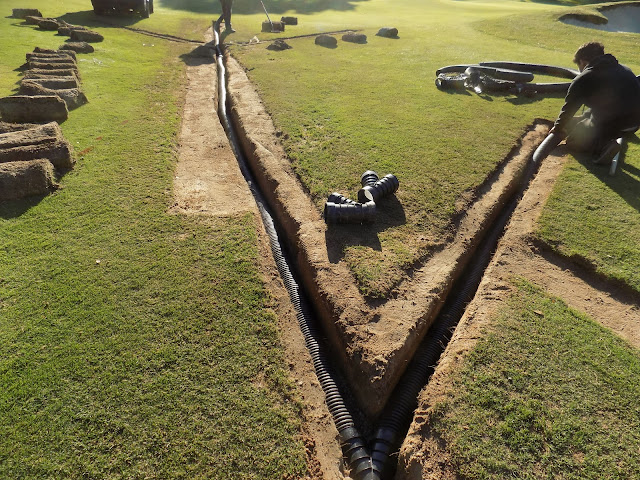 |
| Installation of the drain pipe, then ........ |
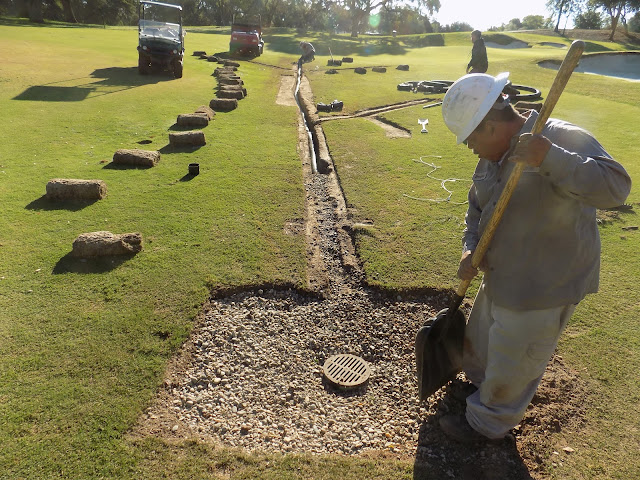 |
| Installation of the gravel over the drain pipe, approximately 8-10 inches, then ....... |
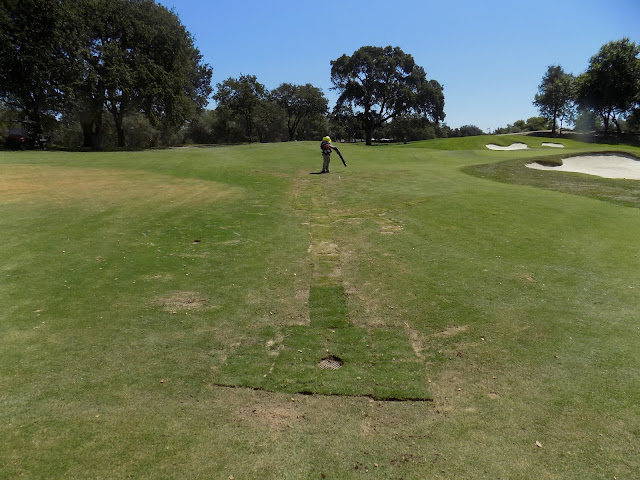 |
| Replacement of the removed sod after a couple inches of some sand for the sod to root into. |
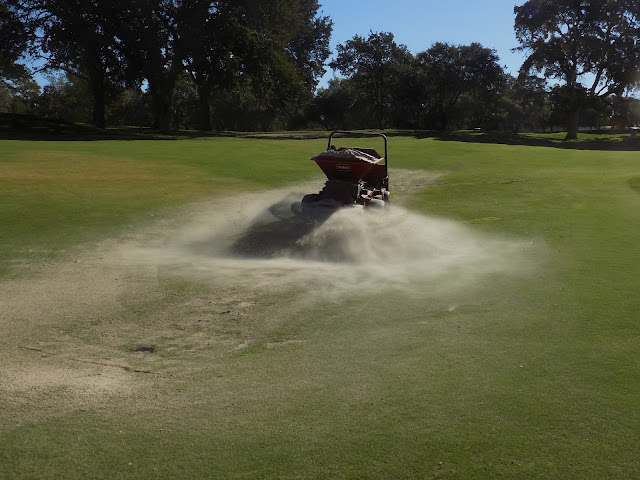 |
Finishing touches include topdressing sand to even out the area. This will require a few applications to get the disrupted area smooth for ultimate playability.
|
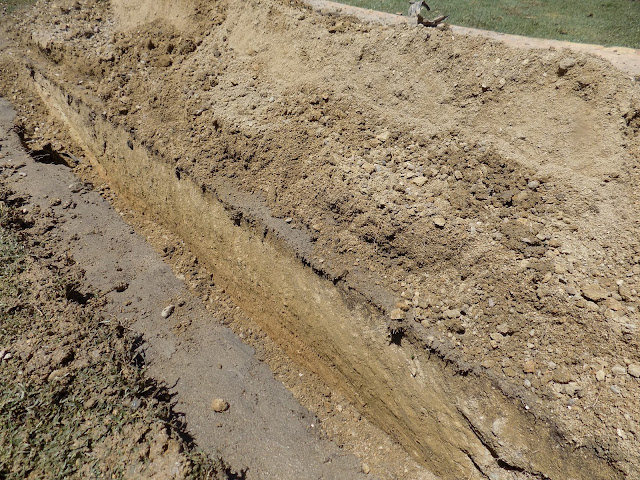 |
| This image of the soil profile in a drainage trench is an example of what we have been dealing with here at Granite Bay since our inception. Very difficult soil to get turf to thrive in. At least now with the Santa Anna Hybrid Bermuda up the middle we have a crop that stands a fighting chance. |
Look for us to continue to work on drainage through July and August. This allows us to irrigate more efficiently without the highs and lows of reacting to boggy, wet areas by turning off sprinklers surrounding the area to dry out the bog, resulting in drying out the turf associated with the irrigation these turned off sprinklers are designed to provide.
Thanks for your patience. The Best Is Yet To Come!


No comments:
Post a Comment